This section provides a comprehensive view of the code generation flow—starting from the initial setup (method selection) to the final output (pushing the code into the GitHub repository)—in the process of creating an application. To generate code, this process can be classified into the following stages that the user must follow:
- Prerequisite Steps
- Create an Application by Selecting the Tech Stack
- Edit the Application / Add Entities and Fields
- Perform Post-Editing Actions
Sync
Preview
5.Build and Download the Code
6.Push the Code to the GitHub Repository
1. Prerequisite Steps
- Create an Account-Sign in (existing user)/ sign up (new user) on website https://fabbuilder.com/ using a valid and active Email ID.
- Create a Workspace-After signing in, navigate to the Profile tab and create a workspace by entering a name.
- ·Add Credit Points-Add credit ( Screen- Add Credit) using the Payment option by clicking on the Credit Points icon.
- Set Up GitHub Integration-Ensure you have an active GitHub account to integrate with the code generation tool.This is required to automatically push the generated code files to your GitHub repository.
2. Create an application (mandatory)
This is the initial step in configurating the tool for code generation. User must select one method among the generate withAI,Template, to create an application. This creation process allows user to select or automatically generate tech stack of back end, frontend, database based selected methods.
Once an application is created, the user is redirected to configurator screen.
3. Edit the Application
User can edit the application by edit the tech stack added previously and add entity.
Edit application Tech stacks(optional)- User can edit the application stack by clicking on edit button from configuator view screen.
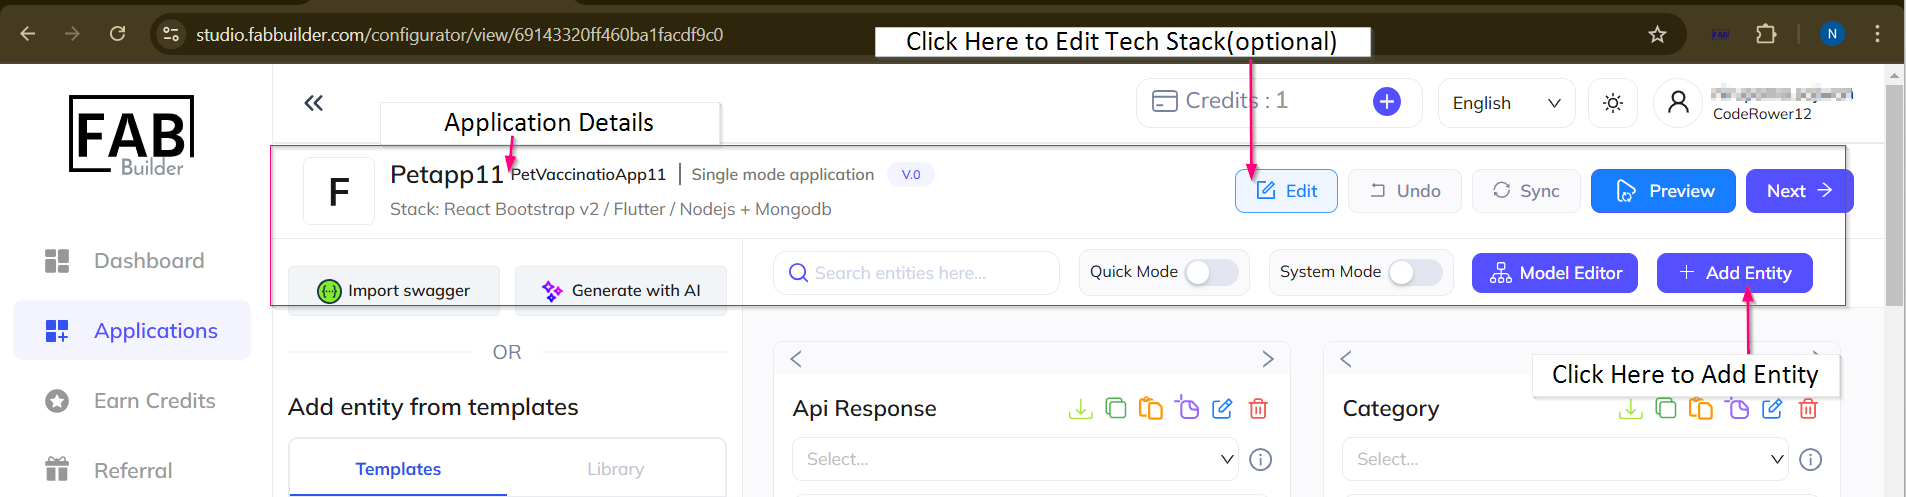
Screen - Edit The Application
Add Entity(Mandatory)-Based on the selected method, adding entities may be:
· Optional for: Swagger, AI Generator, and Template methods
· Mandatory for: Scratch method (as no entities are pre-defined)
User can refer the same section Add Entity for complete description.
4.Action After Edit the Application
Sync (optional)- Sync the updated application within the system.
Clicking on the Sync button after adding or editing the entities and fields. This saves your changes and updates the system with the latest configuration. However, system will automatically sync with in the application.

Screen-Sync,Peview,Next
Preview (Optional)
View a virtual scratch version of the application can be view by clicking on the Preview button.
It helpful for reviewing UI and entity relationships before final build.
Next (Mandatory)
After syncing the configuration, use must clcik to the Next tab to move for next step.
This takes you to the screen 1 Configurator Overview. You are now ready to build the application code.
5. Build the Code (mandatory) and Download
After clicking the next button, user is directed to Configurator Overview screen. Navigate to Build up the Code button. The system generates code based on the entities and setup you defined.
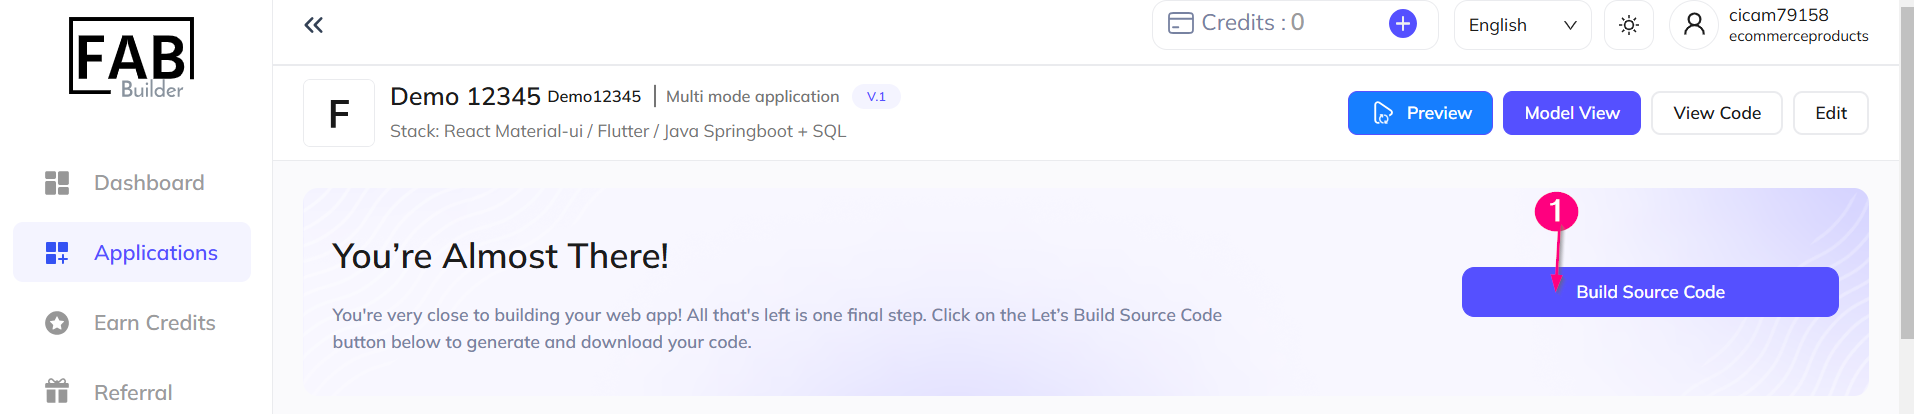
Screen-Build Source Code
Once the code is generated, User can download it to his local device or can push the code to git hub .
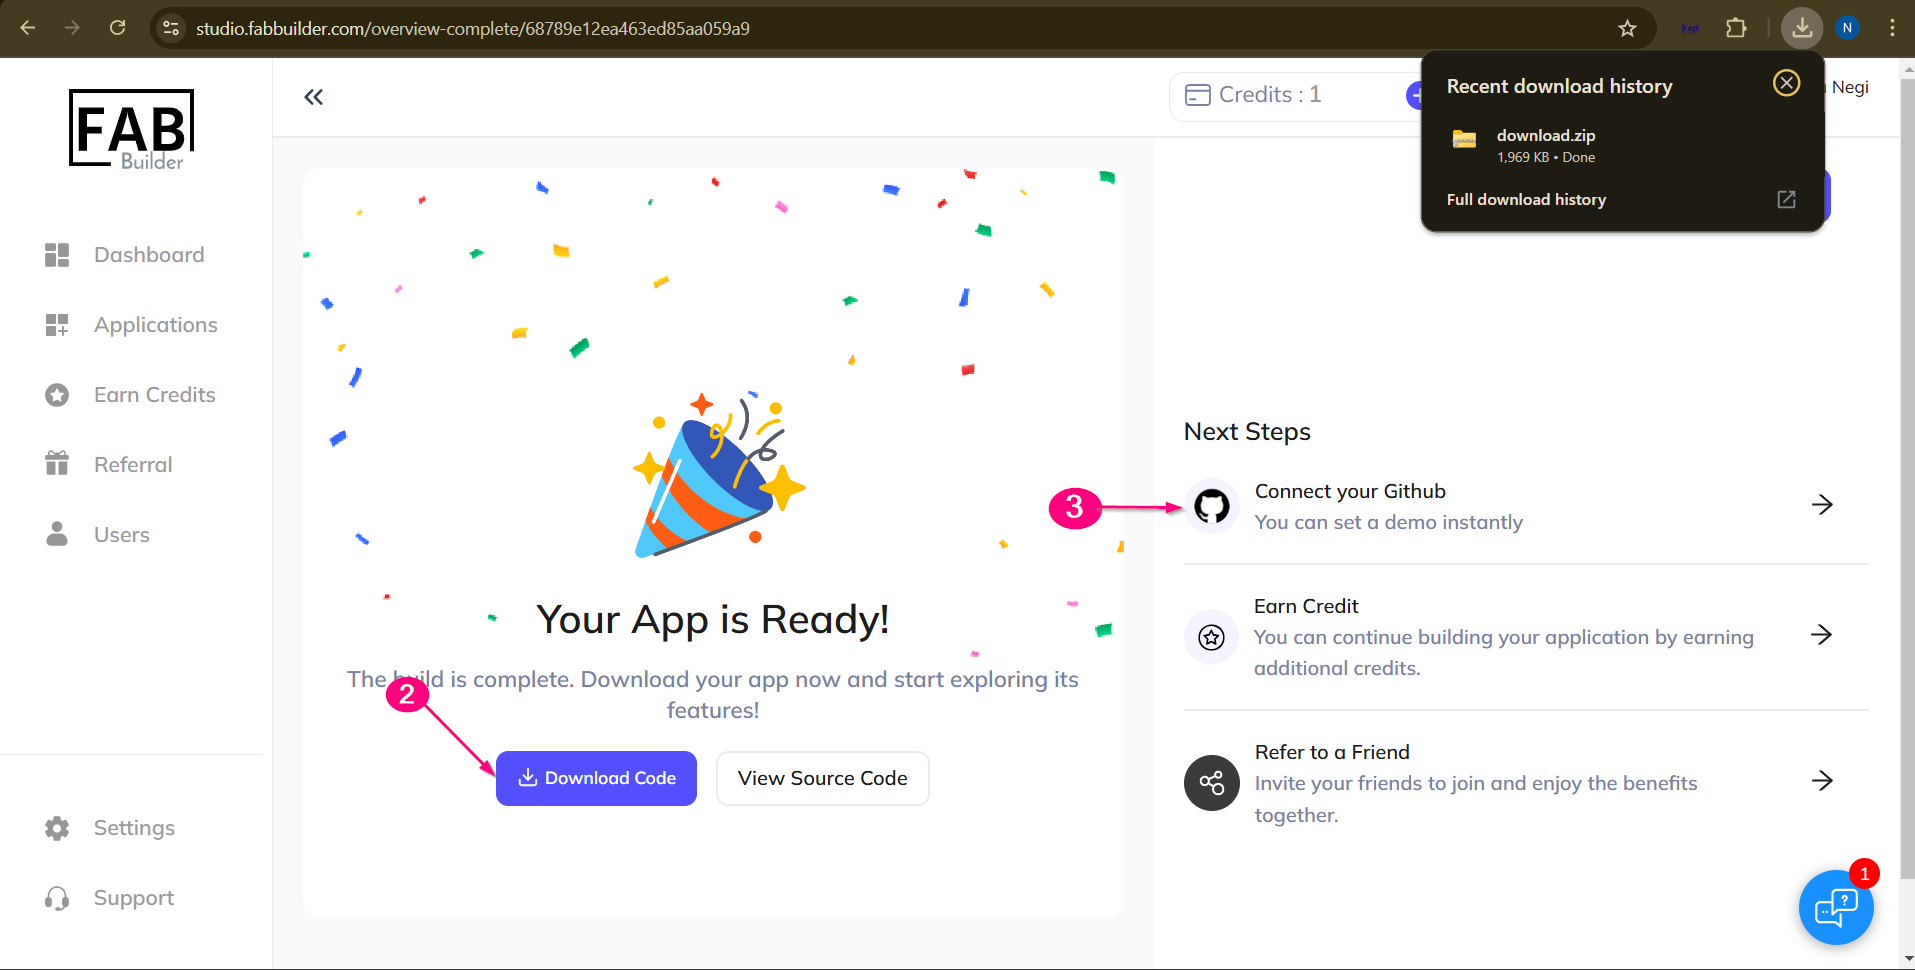
Screen-Download code
6.Push it to GitHub directly from the platform
By following all the above steps user can directly push the code into GitHub by navigating github section on same screen .For more details user can refer FAB builder bot.